Swatch Lessons with SunDaughter Knits!
by Sönna Schuttner
I am so excited to introduce Sönna of @sundaughterknits for this post on gauge swatching! Sönna is a very experienced knitter and knitting instructor, so she’s a great person to teach us the ins and outs of the importance of gauge swatching. She has a funny story to highlight why it is so important too! Please enjoy this guest post by Sönna and then be sure to head to her Instagram and website to support her work!
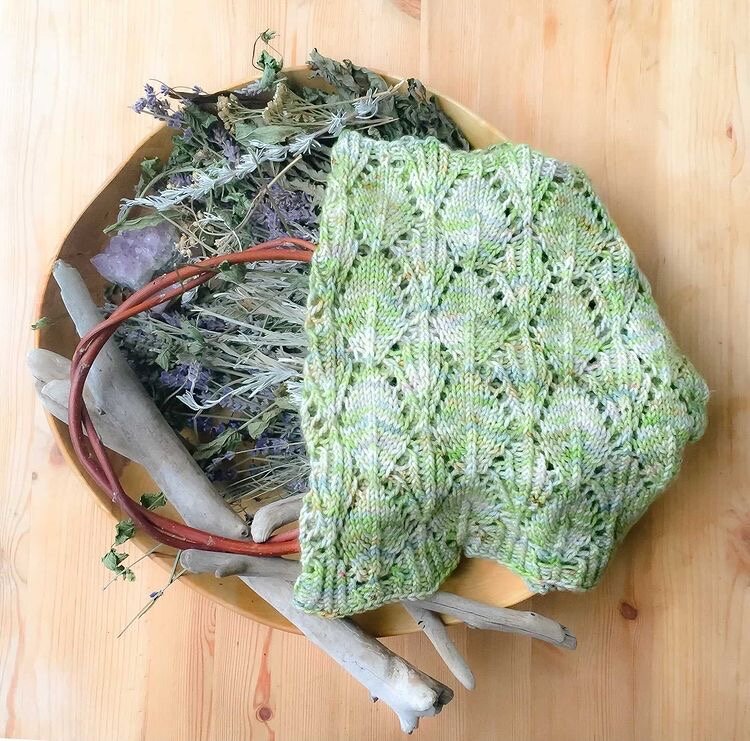
Sönna is pictured above in her Plant Lady Cowl (also pictured below, bottom right), which she is offering to my blog readers for FREE through this Sunday (Feb. 28)!! Make sure you read to the bottom of the article for the code!
Hi! My name is Sönna and I am a swatcher. I KNOW… it’s weird. I’m one of those oddballs who loves to swatch. I love to keep my swatches. Little stacks of them make me happy. I have learned a ton by swatching and I have a story for you. It's one of those stories with an epic error and damn good lesson. Perhaps you can learn from my epic error and avoid your own! Haha
But first: What is a swatch again?
Do we HAVE to make one? And how do we make one? What if my gauge doesn’t match the designers?!
A swatch is a fiber artist’s version of a paint chip. It's like a little measure of how this project will work out with those needles or hooks and that yarn or color combo. A swatch is a small (usually square) piece of fabric we work up before we start the actual project. Everyone makes stitches with their own unique tension, and even our own tension will change over time or with stress/relaxed crafting or (as I’m about to share) with environmental conditions. (Actually, quick detour: One time, I was knitting the back panel of a sweater. I am one of those crafters who knits everywhere - at the playground, waiting for a coffee, in line at the grocery store, during a movie… Well, I knit during the movie Alien and my stitches were so tight you could see the inch and a half of my sweater where Sigourney Weaver was fighting for her very life!)
Okay: back to the point. While it can also be useful for previewing color work to see if it will turn out as we hoped, it is essential to swatch so that we can compare the stitch size WE make with that yarn and those tools to the stitch size the DESIGNER makes. We must match up that gauge or else our finished object (“FO”) could be drastically too large or small. A few stitches per inch in that gauge swatch could mean inches and inches in the FO. The fiber content of our yarn and the material (wood, metal, brushed metal, etc) of our tools will both impact this, along with our personal tension.
I used to hate swatching: all those stitches being made, often to be ripped out! But I learned the hard way that it's way better to make a tiny square to possibly rip out than to work up a sweater and get hundreds of thousands of stitches in before learning the sizing will be fine… or not, and have to rip it out. So, the answer to the second question is no. We do not have to make a swatch. For a hat or mittens, it's not that big of a gamble - if you have to frog back and cast on with different needles it's kinda the same as frogging a swatch. But for a sweater… well it's too much of a gamble for my comfort! (Though I was once told that the whole reason humans invented sleeves was to work them cuff up and call them your gauge swatch.)
But HOW to make one?
There are a few simple rules:
Unless instructed otherwise, if the pattern is written flat, work flat. If the pattern is written in the round, work it up in the round (there are tricks to swatching in the round but NOT working 2x as many stitches, and some day we shall cover that, but not here).
Work your swatch up in the stitch pattern indicated by the designer. With the wide range of crochet stitches, this is more obvious for crocheters, but I will have many a knitter come into the yarn shops I’ve worked at having knit up a swatch in stockinette when the pattern was a lace cowl. Lace stitches are very different widths than stockinette, garter ridge is a different height than stockinette. Ya gotta match it up!
Create a swatch that is 6in or 15.5cm square minimum. This will allow us to count the stitches and rows in the 4in or 10cm that is centered on the fabric. Those edge stitches and rows can contort things a bit.
Count those stitches and rows over the whole 4in or 10cm - don’t cheat and try to only count an inch. We need an average. So measure all 4 inches and then divide by 4 to get stitches per inch.
WASH AND BLOCK YOUR SWATCH BEFORE CHECKING GAUGE (unless instructed otherwise by the designer). Yes. I yelled that. Our fabric can change dramatically when washed and it's super sad to think you just made this lovely fitted sweater only to find out it was actually a super loose tent like thing.
Lastly: (not required at all but helpful) I measure my gauge before I wash and block and write that down. It lets me check my gauge as I’m going to be sure I’m not getting looser or tighter.
Last lastly: (also super not required at all) I keep my swatch. I could always rip it out if I need the yarn to complete the project, but I love to have it hanging on my fridge or bulletin board while I’m working. It makes me happy. The useful thing is to be able to double check myself and be sure I was on.
If our gauge matches that indicated in the pattern, we are good to go. Whoot! Cast on or get hookin. If our gauge does not match, we gotta swatch again. Here are the two rules to remember to figure out how to adjust our gauge should our stitches be off:
If we have too FEW stitches in 4in/10cm that means our stitches are too BIG. We need to go DOWN in tool size to try again. (too few= too big so I was taught to say “less is more” to remind myself of this.)
If we have too many stitches in 4in/10cm that means our stitches are too small. We need to go up in tool size. (If “less is more” than more must be less and that is the logic game I play each time I do this. And yes. I play it each time I do this! haha)
We have covered what a gauge swatch is. I've made it clear we don’t have to make one but we do have to live with the consequences of choosing not to. We know how to make one and what to do if the gauge doesn’t match.
So let's move on to my epic error.
Loving to swatch isn’t the only thing that makes me a weirdo. I also love hot weather. I love it hot and humid. Because of this I am sure to visit my dad who lives about 2 hours North of Dallas, Tx USA in August. It's that wonderful 105*F where you step outside and are instantly wet with sweat. Being addicted to crafting as I am, I can often be found outside sitting on the very edge of a chair (hot bum) with my arms propped up, elbows on table so my pits can get the breeze and knitting on small projects (it's just too hot to have a sweater in my lap - it will get wet with sweat and thats just icky). I played for days with a leaf and stick bundle image I had in my head after seeing @badsheepyarn’s colorway Plant Lady. Eventually, I designed a cowl and cast it on. I was so excited, I knit it up in two days in heat so hot my hands were sweaty and the yarn a bit damp but I didn’t care. And then the visit ended and I traveled home to Seattle. (Can you see where this is going?)
By the time I got around to making a gauge swatch months had passed and it was now a much more temperate 60*F with considerably lower humidity. My design process often had me so excited about the finished object, I would just make it quick and swatch later. Logic told me I could use the same yarn and needles to work up a gauge swatch - what did it matter if it was before or after the FO was made? I would match my own gauge right?
Logic lied to me ya’ll.
I moved the pattern through the design phases and it got to testers… who swatched. They were good testers and were sure to match their gauge to my gauge. Many of them were even using the squishy DK from BadSheepYarn that I was using but most of them had to change the needle size to get gauge. Aaaaaaand then, one by one, they all ran out of yarn. I was soooo confused because I had plenty left over AND I knit a whole swatch after I cast off my cowl. I was sure I had counted the gauge wrong. I re-measured my swatch. It was correct.
Finally some of my more experienced testers sat me down and were like “Hun, something is up and you are gonna have to cast on again and knit a new cowl.” I whined a bunch, but I did it. And ooooohmegooooodnessssss, was it different. My dry 60* cowl was soooooo much looser than my wet 105* cowl. Just to be sure, I weighed the two cowls. The dry knit cowl was nearly 10g less than the wet knit cowl. I thought I was going bonkers until I picked up my knitting after washing my hands and the reality of the situation dawned on me: the humidity and temperature of the air made a huge difference in my gauge! (duh) The lesson was learned two cowls and many swatches later.
So, in summary, knowing that our gauge matches that of the pattern allows us to better predict the outcome of our project. We gotta swatch if we want that control. But also our gauge will not only be impacted by the tools we use and our own personal tension levels, but the environment our stitches are made in will have an impact too.
(Also I was able to save the whole pattern by changing needle size to get my wet cowl gauge. ;) )
♡♡♡
Thank you for reading this great post about the importance of gauge swatching by Sönna of @sundaughterknits .
Sönna is offering a coupon code to my blog readers to get her PLANT LADY COWL pattern for free! This is one of my favorite patterns. If you made it this far, you’re in luck. Head to her website now and use the code “TheSkeiniac” to get the Plant Lady Cowl for free until this Sunday, February 28, 2021.
Please go show Sönna some love and support:
website : www.sundaughterknits.com


